Saturday, March 3, 2012

Happy 1st Birthday Baby Claire!


A Year of Firsts
A Year of Fun
Our little doll is turning 1!!

Last weekend we celebrated Claire's 1st Birthday! It is hard to believe that a whole year has already gone by! Even more amazing is how, in only one short year, this little person grew from the precious, helpless, tiny infant to a beautiful, walking, talking, singing and giggling love bug; so full of life and personality! She is such a blessing in our little family and we have loved every moment of her first year of life.  


 She is an amazing little girl.  She has music in her soul and a song in her heart. She will literally dance and sway and sing if she hears any music at all. She is so funny and makes faces- because she knows it's funny and adorable!  She is rapidly expanding her vocabulary and it is so fun when she says real words out of the blue! She says Dada, Mama, cheese, yesh (yes), uh oh!, baby, Bubba (for Jack), hi, bye bye, up, Bumpa (for Grampa- whom she adores!) Mimi (for my mom), cheese, bottle and many more! She is such a delicate, tiny little thing, yet she is fearless, spunky and determined. She gives love to Jack all the time, adores him really.  Her favorite thing to do is whatever he is doing. She wants to be wherever he is and even if its something to hard for her- she will try until she is doing it too.  Jack loves her to pieces too.  He of course gets annoyed with her when she messes up his line of cars, or changes the channel when he is watching Kratt Brothers, but he will out of the blue tell me, "I love ClaireBear so much!" and I know he means it. Their relationship is precious, and I pray they will always be close.

 I am excited to continue to watch her grow and blossom.  And most importantly, I pray that her sweet and tender heart will always be drawn to the One who created her so lovingly and so intricately.  She is a precious "sweet little heart" as Jack called her.

Happy 1st Birthday Claire Bear!!


She is my little doll, and I had so much fun dressing her in outfits that were mine when I was a baby! It was fitting since I planned her little party to have a 
"Vintage Baby" theme.


I made sugar cookies, lemon bars, and raspberry filled cupcakes with raspberry butter cream frosting and lemon filled cupcakes with regular butter cream frosting. It was my first time doing the filled cupcakes, but they turned out really yummy! I had so much fun collecting little vintage items like the baby planter (bottom left photo), the vintage lamb planter (bottom right photo), and the vintage rocking horse, and vintage "first year" frame (in the drink station photo)! I made all the cupcake toppers (with Sean's help...he's the graphic designer), the tissue poms, "Claire's 1st Year" banner and photo banner, the little high chair tutu, and the #1 piñata!

"Claire's 1st Year" in photos

Drink station with pink lemonade and strawberry milk for the kids (not pictured)

I think she was overwhelmed by all of the people and the attention, so she fell asleep, safe and comfy in Mimi's arms (for like 45 minutes!- which is crazy for this little one who never naps!!)


I planned two little old-fashion(ish) games for the bigger kids; Pin the Bow Tie on the Ducky, and the Pinata. Claire slept through this part, but oh well!


Finally awake! and ready for her party!
Cupcake time!


Opening presents with Mommy 
these are my people :-) can you tell we are all related?

Claire with Grandma and Grandpa!
Just in case you were wondering what the boys were doing amidst all the pink and tulle...


We had Shirley Temple music playing in the background, and this little doll couldn't help but dance! It was so cute! Don't you love those little legs? 

It was such a fun day and Claire is so blessed to have so many people that love her! Thank you to all our family and friends who came to celebrate her!


xo


Photobucket

Thursday, December 8, 2011

Mmm D' Licious: Gingerbread Cookies!

Tis the Season to be Jolly...and bake lots of delicious Christmas treats! These Gingerbread Cookies are a favorite of mine. They are just the right consistency and oh so delicious!


Ingredients:

1 Cup butter
3/4 cup brown sugar
1/4 tsp salt
1 tsp cinnamon
1/4 tsp cloves
2 tsp ground ginger
1/2 C molasses
1 egg
3 1/4 C flour
1/2 tsp baking soda

Directions:

Cream together butter and brown sugar.
Add salt, cinnamon, cloves, ginger and mix.
Add the egg and mix.
Add molasses and mix until combined.
in another bowl combine flour and baking soda.
Gradually add to cream mixture.

If you want to roll out the dough and use cookie cutters, chill for an hour first. then roll it out on a lightly floured surface. Do not roll too thin.

Otherwise- scoop out dough onto cookie sheet (I placed them on parchment paper)

Bake at 325 for 9 minutes.

They may not look done, but trust me- they are sooo good as long as you don't overcook them!
Let them stand for a minute on the pan and then place them on cooling racks. Allow them to cool completely before frosting!

Frosting:
2 1/2- 3 C powdered sugar
3 Tbs milk
1/2 tsp vanilla
1/4 tsp almond extract

[This frosting is kind of to-taste, and you have to make sure it is not too thick or too runny.]

Add a few drops of your desired food coloring, get your little helpers, and you are ready to frost your cookies!

Jack is my little taste-tester....quality control :-) 
Enjoy!

Saturday, November 26, 2011

Thankful Times Three

Happy Thanksgiving Everyone! I cannot believe the holidays are already here! Where has this year gone? I can honestly say this has been the hardest year of my life. I know that sounds horrible, but there were several huge events/circumstances that occurred this year that literally changed my life. Things that I never could have guessed or imagined would ever happen in my life or the lives of the people that I love. And yet through the trials and the storms, the faithfulness of the Lord is even more evident, and His loving hand and blessings in our lives even more precious and poignant. 
Jesus said, "In this life you will have many sorrows, but take heart I have overcome the world."

Though we may not understand the sorrows or the circumstances that come into our lives, we can always trust that the Lord will be our Wonderful Counselor, our Mighty Sovereign God, Everlasting Father, and Prince of Peace; a peace that surpasses all understanding. This is who God is, and through the sorrows that we face, if we will draw ever closer to the One who Redeems, Restores, Rebuilds and Renews, we can still have a deep and inexplicable joy and gratitude that only the Lord can give.   We can still rejoice and thank Him through the suffering for we know that in all things God is working for the good of those who love him, who have been called according to His purposes (Rom. 8:28). 

The Lord is so gracious and loving, that even through the suffering He sprinkles incredible blessings and surprises along the way. One of the most amazing blessings this year was the birth of our precious Claire Marie!


She is my sweet little Claire Bear and the past 9 months have been priceless, precious moments of firsts with her. She is growing and changing everyday, and I have truly treasured these special times with her. 


There is no greater blessing in the world than these precious little children. I am thankful everyday that the Lord chose me to have the awesome privilege of being their mommy. Jack is so funny and so incredibly smart, he never ceases to amaze me. He literally is this bundle of joyful energy that is constantly laughing and bouncing off the sofa, the ottoman, and the walls! You just cannot help but feel joyful when these little miracles are around!


I love my sweet husband and my precious babies so much! They are such gifts from the Lord! And now....He has chosen to surprise us and bless us yet again...


with another baby!!!


We could not be more excited or more grateful this Thanksgiving for these precious children He has given  to us!! 


I am 16 weeks pregnant now and feeling pretty good! We cheated and already found out the gender of this sweet little one! hehe...

It's a GIRL!!!
Little baby girl #2 is due on May 12th, 2012.


Thank you Lord, for continuing to bless this little family, and for being so faithful to us!


Happy Thanksgiving!!


A Fairy and a Tail (Dinosaur Tail that is)


It may almost be Christmastime, but here are my two little loves on Halloween :-) 

Jack was so cute and he loved his dinosaur costume, especially his tail. He still doesn't really understand/like the idea of costumes though.  He thought people really thought he was a DINOSAUR, a real dinosaur.

He would ROAR as loud as he could, then say, 
"Its just me, Jacky."


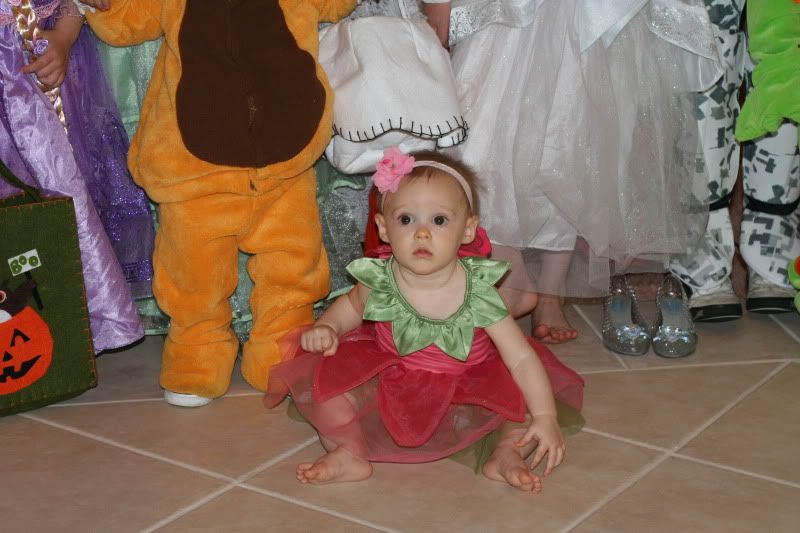
Claire was a "Princess Fairy" according to Jack.  She is just so darling, and now that she is  standing up and cruising all over the place, she is a busy little bee. 
She is such a precious little girl. I feel like she is getting so big, so fast! I love her little feathers that stand straight up! Thats just like my hair was when I was a baby!


We had such a fun Halloween bouncing from one house to the next! We went to Sean's cousins' party first, but I was so bummed because all of my pics were blurry. Darn lense. (certainly it was not due to user error). haha 
And Jack was exhausted, and fell asleep on the way to the party...so I thought it was going to be a disaster of a night.
You can see he was not into taking these pictures. 

Then we went to my see my mom, where most of the pics were blurry again.


From there we met up with my sister and her kids at our Nana's house.  Our cousins were there with their kids too! We actually got a picture with all of the kids looking cute and smiling! Not my camera of course because I had on the wrong lense. Dope.


Jon Jon, Jack, and Jakey

Claire Bear amongst all the big(ger) kids.
Jack & Nicky


We ended up having a really fun Halloween!
xo

Wednesday, November 9, 2011

Mmm D'Licious: Pumpkin Spice Whoopies

I am a big fan of BHG. Aren't you? Well I stumbled across this page of Better Homes and Gardens "41 Yummy Pumpkin Recipes" and I wanted to try them all. I didn't, but I did try this one! They were delicious, but I could only eat 1/2 of a cookie at once. They are very rich! 

Pumpkin Spice Whoopies


Ingredients:
1 cup canned pumpkin
1/3 cup butter, softened
1 box spice cake mix
2 eggs
1/2 cup milk
1 recipe Marshmallow-Spice Filling

Directions:

1.Preheat oven to 375 degree F. Line a cookie sheet with parchment paper 
 In a large mixing bowl beat pumpkin and butter with an electric mixer on medium speed until smooth. 
Add cake mix, eggs, and milk; beat on low speed until combined, and then on medium speed for 1 minute.

2.By the heaping tablespoon, drop mounds of batter 3 inches apart on cookie sheet; keep remaining batter chilled. Bake 15 minutes or until set and lightly browned around edges. Carefully remove from parchment or foil; cool on wire rack. Repeat with remaining batter, lining cooled cookie sheets each time with new parchment. 


Marshmallow-Spice Filling
Ingredients:
1/2 cup softened butter
1 8 ounce package softened cream cheese
2 cups sifted powdered sugar
1/2 7 ounce jar marshmallow cream
1 teaspoon vanilla
1/2 teaspoon ground cinnamon
1/2 teaspoon ground nutmeg

Directions:

Up to 2 hours before serving, beat together butter and cream cheese until smooth. Add powdered sugar, marshmallow cream, vanilla, cinnamon and nutmeg. Beat until well combined.

Spread about 2-1/2 tablespoons filling on flat side of one cookie; top with a second cookie. Repeat. Serve immediately or cover and chill up to 2 hours. Makes 15 whoopies.


Enjoy!

Tuesday, November 8, 2011

DIY: Cupcake or Cookie Stands

Here is one of the other projects I did for Jack's party:

  Cupcake/Cookie Stands 


Materials:

3 Plates [mine were 1 large and 2 salad size plates]
3 Martini glasses
E6000 glue
Spray paint primer & paint

This is so easy, it almost doesn't even need directions, but just in case...here's what I did:

1. Prime glasses
2. Spray paint glasses
3. Glue plates to the bottoms of the glasses
4. The end.


I told you it was easy! And only costs about $9 if you luck out like I did! 

Plates -Target $.89/ea
Glasses- Dollar Tree $ 1.00/ea
Spray paint: $3 [I had the primer already...not sure I really even needed to do that step..but I did. Also I only bought the half can size of black spray paint because I didn't need very much]


Sunday, November 6, 2011

DIY: Party Piñata

A couple weeks ago we celebrated Jack's 3rd birthday! I wanted it to be really special for him, but I didn't want to spend a ton of money on a 3 year olds party. The answer? I did a lot of it myself, and I had fun doing it and planning it! I sort of pretend to creative/crafty, but really I just find ideas I like and either copy them, or figure out a way to do it myself. Sometimes it works. Sometimes, it doesn't.  I thought it would be fun to share some of the little "DIY" things I did for the party. So here is the first one: 

The #3 Piñata. 
[Disclaimer: I didn't use this as the actual candy-filled piñata, so I'm not sure how your would leave a "door" to fill your piñata, or attach something to it to hang it...maybe I'll try that next time]

Materials:

Large cardboard box
Exacto knife
Scissors
Strong masking/packing tape
3 rolls of streamers (or however many colors you want to use)
Mod Podge
Paint brush


Step 1:
Draw your number on your cardboard box [Mine was about 3'x2']
Cut it out using your Exacto or scissors
Trace it onto the other side of your box
Cut out second number

Step 2:
Cut out strips for the sides of your number [about 6" across]

Step 3:
Tape your strips to the bottom number.
If you are planning to use it as an actual piñata, make sure you really use strong tape [mine was just for decoration]
Once you have taped all your sides onto the bottom number, tape the top number onto the sides.

Step 4:
Fringe your streamers. Easiest way to do this is to fold it back and forth to create lots of "layers" to cut at once. [Also, if you have fringe scissors, that would speed things up...I didn't].


Step 5:
Start at the bottom of your number, on the front side, paint a section with Mod Podge and lay your streamer onto it.
Cut Streamer at the edge of the number.
Repeat.
Once you finish the front, turn it over and do the back of the number, again starting from the bottom and layering your streamers.
Then you do the same for the sides. Just make your way around the number.


Ta-Da! Your very own homemade Piñata! Super easy, super cute for a decoration or our actual piñata and the best part...it's super inexpensive. Grand total: $2.61. [unless you have to buy mod podge, then add a couple dollars.]


Related Posts Plugin for WordPress, Blogger...