Showing posts with label DIY. Show all posts

Saturday, October 27, 2012

Happy Super 4th Birthday Jack!

I can't believe it has already been four years since we brought this little guy home from the hospital! He has been such an incredible blessing and I am really trying to savor the time with him before he has to go to school! It seems like that time is approaching too quickly!!


We had his birthday party a couple weekends ago and we had such a fun time! It was a Super Hero party per his request! I'm a wanna-be DIY-er..so I had fun finding cute ideas (thanks pinterest!) and bringing them to life! I made the pinata, and most of the signs and decor too! My MIL sewed the capes and I made the felt initials for the capes and masks for each child! We had a "Super Hero Bootcamp" obstacle course and a little scavenger hunt for the "Caped Cupcake Crusader" who stole the birthday boy's Super Cupcakes! I also tried a couple new recipes that looked cuter than they tasted! But most importantly, Jack loved every second of it. It was so fun to celebrate him with all our friends and family! Thank you to everyone who came to celebrate 

Jack's Super 4th Birthday!!

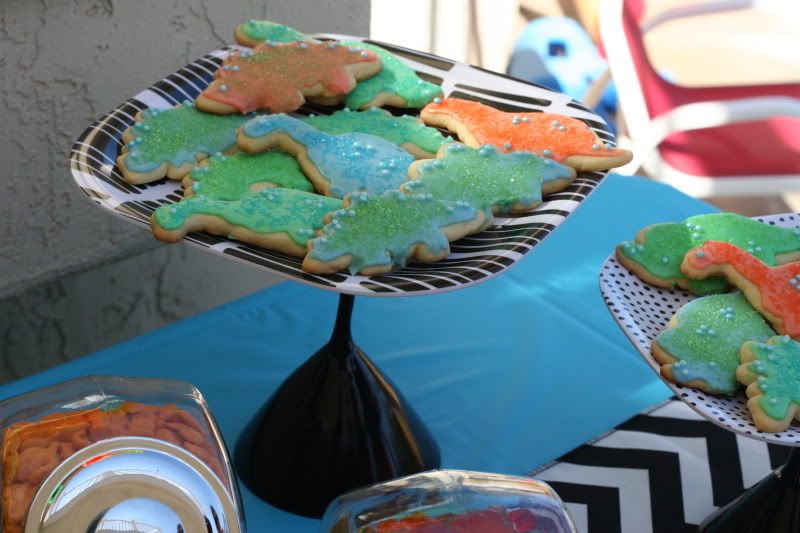
Dessert table: Super Hero Jello squares, Super Hero lollipops, Pop Rocks, Sugar cookies, Cupcakes & More!
Super Hero Lollipops!

Piñata, cupcake toppers, Drink station with Punch and Cake batter Rice Krispie treats!
The Capes!! Love how these turned out!
The Capes and masks were a huge hit with the little Super Heros! They had so much fun doing the Super Hero bootcamp to earn their Super Capes and Masks! Even the girls loved them! 
{Clearly their pink...so whats not to love!!}

Super Hero Bootcamp! Through the tunnel, down the slide, cross the lava pit, and shoot the villains!


After the Super Hero Bootcamp they used their Super Strength to knock the candy out of the Piñata!


Then it was time for Cupcakes....only....they were gone!!!
Instead of cupcakes, they found clues..to the whereabouts of the Caped Cupcake Crusader!!


Hello little Superheroes and thanks for the treat! 
These Superhero cupcakes can’t be beat! 
Too bad for you I’m hungry as can be 
I’m the Caped Cupcake Crusader 
and you’ll never find me! 

If you can find me, I’ll lead you to them. 
Then you’ll be superheroes… let the hunt begin! 


Clue #1 

Sometimes at a park, 
always at the beach, 
this stuff gets quite messy 
and sticks to your feet! 

{next clue was in the sandbox}


Clue #2 

You may be Super 
and you may be tough 
But unless you’re a S’more- 
this place is too hot to  touch! 
{next clue was in the fire pit}


Clue #3 

Cupcakes are tasty 
but veggies are too. 
In this place you might find 
a bell pepper or two! 

{next clue was in the garden}

Clue #4 

    On this apparatus you climb up 
                                                                 and slide down 
                                                                 If you look underneath, 
                                                                  The Crusader might be found!


They all ran over to find Jack's 9 year old cousin Jonathan hiding under the slide! The kids loved it! Super Jack was very pleased with their success in finding the Caped Crusader and saving the party!!!


Finally, we sang Happy Birthday and Jack loved his blue cupcake! 


Birthday Boy opening presents!
My boy

  
Happy Birthday Super Jack !
We love you!!

Tuesday, November 8, 2011

DIY: Cupcake or Cookie Stands

Here is one of the other projects I did for Jack's party:

  Cupcake/Cookie Stands 


Materials:

3 Plates [mine were 1 large and 2 salad size plates]
3 Martini glasses
E6000 glue
Spray paint primer & paint

This is so easy, it almost doesn't even need directions, but just in case...here's what I did:

1. Prime glasses
2. Spray paint glasses
3. Glue plates to the bottoms of the glasses
4. The end.


I told you it was easy! And only costs about $9 if you luck out like I did! 

Plates -Target $.89/ea
Glasses- Dollar Tree $ 1.00/ea
Spray paint: $3 [I had the primer already...not sure I really even needed to do that step..but I did. Also I only bought the half can size of black spray paint because I didn't need very much]


Sunday, November 6, 2011

DIY: Party Piñata

A couple weeks ago we celebrated Jack's 3rd birthday! I wanted it to be really special for him, but I didn't want to spend a ton of money on a 3 year olds party. The answer? I did a lot of it myself, and I had fun doing it and planning it! I sort of pretend to creative/crafty, but really I just find ideas I like and either copy them, or figure out a way to do it myself. Sometimes it works. Sometimes, it doesn't.  I thought it would be fun to share some of the little "DIY" things I did for the party. So here is the first one: 

The #3 Piñata. 
[Disclaimer: I didn't use this as the actual candy-filled piñata, so I'm not sure how your would leave a "door" to fill your piñata, or attach something to it to hang it...maybe I'll try that next time]

Materials:

Large cardboard box
Exacto knife
Scissors
Strong masking/packing tape
3 rolls of streamers (or however many colors you want to use)
Mod Podge
Paint brush


Step 1:
Draw your number on your cardboard box [Mine was about 3'x2']
Cut it out using your Exacto or scissors
Trace it onto the other side of your box
Cut out second number

Step 2:
Cut out strips for the sides of your number [about 6" across]

Step 3:
Tape your strips to the bottom number.
If you are planning to use it as an actual piñata, make sure you really use strong tape [mine was just for decoration]
Once you have taped all your sides onto the bottom number, tape the top number onto the sides.

Step 4:
Fringe your streamers. Easiest way to do this is to fold it back and forth to create lots of "layers" to cut at once. [Also, if you have fringe scissors, that would speed things up...I didn't].


Step 5:
Start at the bottom of your number, on the front side, paint a section with Mod Podge and lay your streamer onto it.
Cut Streamer at the edge of the number.
Repeat.
Once you finish the front, turn it over and do the back of the number, again starting from the bottom and layering your streamers.
Then you do the same for the sides. Just make your way around the number.


Ta-Da! Your very own homemade Piñata! Super easy, super cute for a decoration or our actual piñata and the best part...it's super inexpensive. Grand total: $2.61. [unless you have to buy mod podge, then add a couple dollars.]


Monday, October 3, 2011

DIY Dresser (Almost-Disaster)

Everybody is doing it. And everybody is doing it themselves...right?  Well, I was always taught I could do anything I put my mind to, and up until recently, I would say that I believed that little adage. And after a month and a half, priming, sanding, painting, [insert disaster here] which led to re-sanding, changing to spray paint, re-priming, sanding, re-painting, sanding, followed by painting, sanding, painting, sanding, painting, sanding....you get the idea.  It was a long process.  Sean and I did it together, which was kind of fun, we got to mess up together, share the frustration, and fix it...together. See the life lesson brewing?  It was fun though, and definitely a learning experience.

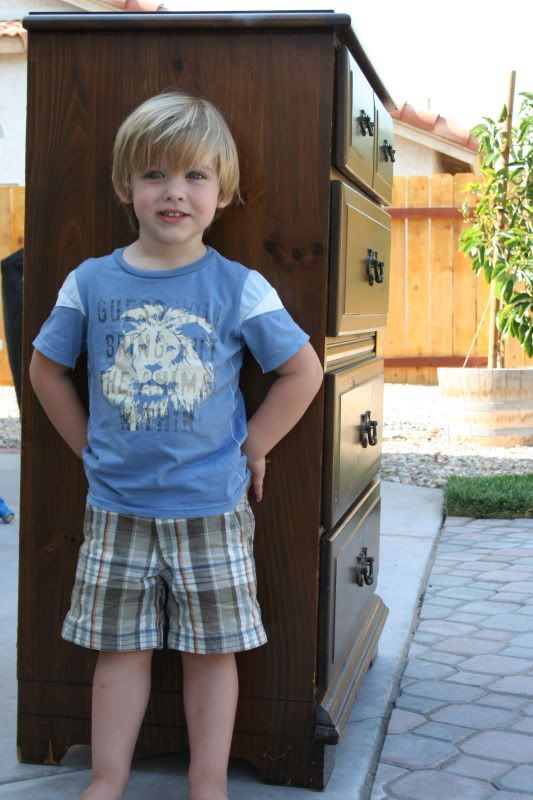
My little helper
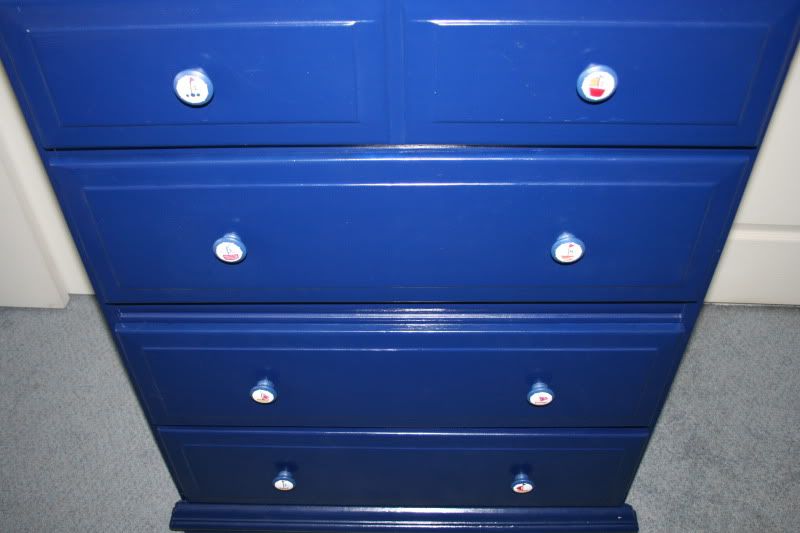
Sean's parents gave us this little brown dresser for Jack {since now his white dresser is filled with pink and flowered dresses, onesies, and rompers}.  The dresser was originally Sean's Grandpas, then his dad's..so it an old piece of furniture, but it was still in pretty good condition, with the exception of some nicks and scratches mainly on the drawers. I always wanted to get Jack a blue bedroom set like this one...but since the little brown one was free we of course took it.  Then after reading a few DIY blogs, I thought I'd try my hand at a little makeover. So we headed to good ol Home Depot and stocked up on all the materials we would need.  Long story short, our first attempt was a heinous disaster. I used a Painter's Touch Navy paint, which was more like bright sea foam florescent royal blue. Seriously. It was horrible. I thought {being a novice} that it might darken when it dried, since the paint in the can looked navy. When it didn't I thought maybe a second coat might darken it. It didn't. I was too frustrated to even take a picture/ did not want to remember the disaster. The good news is that spray paint really can cover a myriad of wrongs.  And we were able to salvage our DIY disaster. 


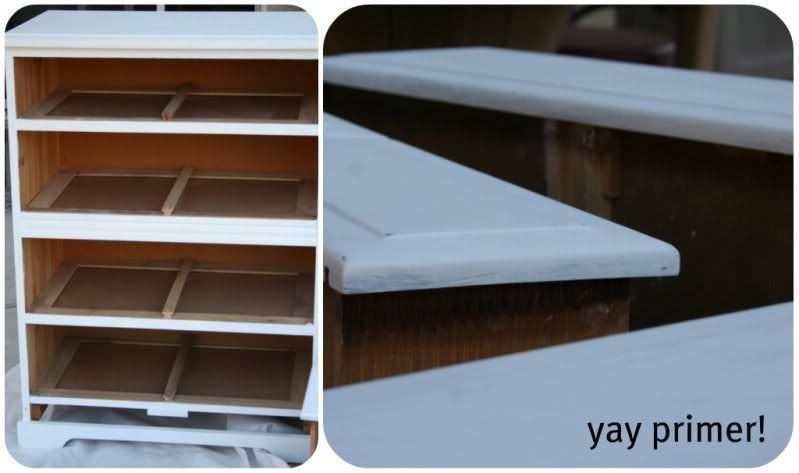
Sanding, filling the holes/scratches, more sanding...

all primed and ready to go
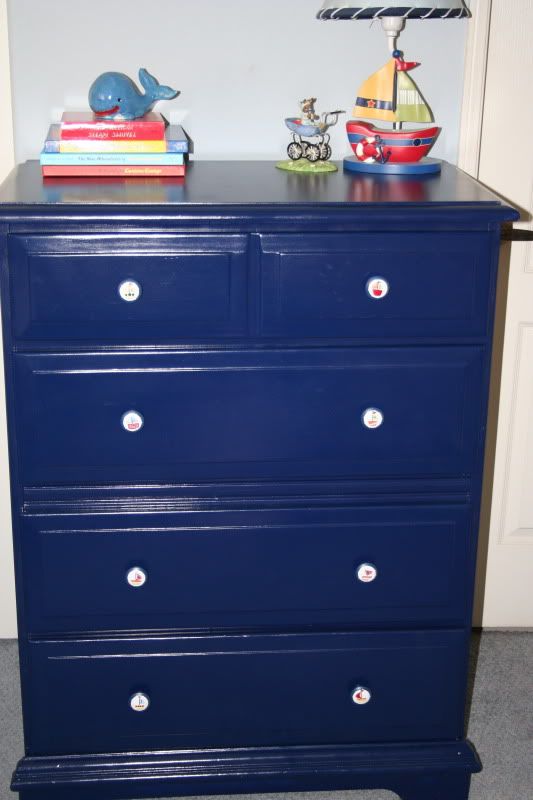
Skip ahead a few steps...[painting...lots of coats....and finish...lots of coats]


We switched the old hardware out for the sailboat knobs from Jack's white dresser. I love how it turned out, and actually still kind of think I can do anything I put my mind to. It just might take a lot of help from my hubby, a lot more time than I first estimate, and a few frustrations along the way, but that's ok. 

Tuesday, July 5, 2011

Marshmallow Sparkle Pops

Every year my Nana has a 3rd of July party at her house. He neighborhood sponsors an amazing fireworks display, so we celebrate a little early!


I was feeling a little crafty, so I enlisted the help of one very adorable 2 year old to help me with my "project."  We made Marshmallow Sparkle Pops.  I'm listing this under D.I.Y. and not Mmm D'licious, because I'll be honest, they look much better than they taste.  My husband tried them and said, "It's like a sugar ball, dipped in sugar and then dusted in sugar...a little to much sugar!" haha. But they did make a cute decoration, and if I had had more time, I would have wrapped them individually and sent them home with people as a little favor.

Ingredients [for about 30]:

Large Marshmallows
Candy Melts {I used red and blue- 1/2 bag of each}
Sprinkles...lots of sprinkles!
Lollipop sticks


How To: 

Follow directions on the Candy Melts bag :-)
Dip one side of the mellow into the melted candy
Dip/roll in sprinkles
Set (candy coated side DOWN) on cookie sheet that is covered with wax paper
Once the candy hardens a little (you can put them in the refridge to speed up the process) repeat on the other side using the second color.
Stick your lollipop sticks in before the candy hardens. I didn't do that, so I ended up sticking them into the marshmallow part that wasn't frosted.

Super easy, super cute, it was just too much sugar for me! haha. Next time I think I'll attempt Cake balls- same idea, but edible!

Wonder where my lil baby face was while we were doing our project? She was just playing in her exersaucer! Such a good girl! We got it down out of our storage and Daddy and Jack put it together for her! I feel like Jack should still be little enough to be in there! I remember when we put him in it for the first time! ahh. how time flies! She loves it! And Jack loves showing her all the little things on it!

my lil helpers!


Related Posts Plugin for WordPress, Blogger...